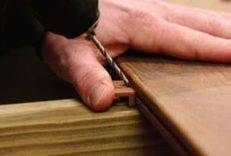


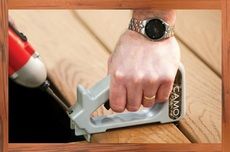
Step 1: Clamp Camo onto your deck board. First predrill on side of board.
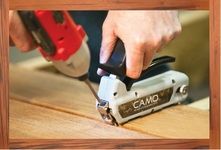
Step 2: Then predrill other side of your board
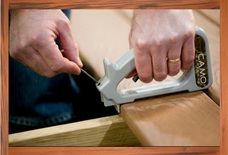
Step 3: Insert your Screw on both sides
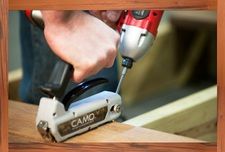
Step 4: Using your drill, secure your screw on one side. Then secure your screw on the other side